
Overview of the usage of Concrete Cube Moulds:
Concrete test cube moulds are used to create standard-sized concrete specimens for compressive strength testing, a crucial quality control measure in construction. These moulds, typically made of steel or plastic, are used to shape freshly mixed concrete into cubes, which are then cured and tested to determine the concrete’s strength and ensure it meets project specifications.
Here’s a more detailed look at their usage:
- Fresh concrete samples are poured into the moulds, ensuring proper compaction to prevent air voids.
- Moulds are available in standard sizes, often 100mm or 150mm cubes.
- After the concrete hardens, the moulds are removed, leaving the concrete cubes.
- The concrete cubes are cured under controlled conditions, typically in water, to allow them to harden and reach the desired strength.
- Once cured, the cubes are placed in a compression testing machine.
- The machine applies increasing pressure to the cube until it fails, and the maximum load is recorded to determine the concrete’s compressive strength.
- The compressive strength results are used to verify that the concrete meets the minimum required strength for the project.
- Regular cube testing helps ensure the quality and consistency of concrete production.
- It can also help identify and address any issues with the concrete mix or construction process.
- Steel moulds: are known for their durability and ability to withstand repeated use.
- Plastic moulds: offer a lighter and easier-to-handle option, especially for field use.
- Some moulds are designed with easy-to-remove features, like compressed air ejection.
- Following standard procedures for concrete mixing, compaction, and curing is essential for obtaining reliable test results.
- Properly cleaning and maintaining the moulds ensures they are in good working condition and produce accurate specimens.
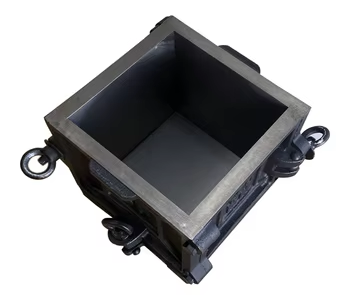
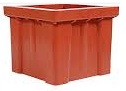
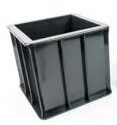
| 150mm CAST IRON | 150mm PLASTIC | 100mm CAST IRON | 100mm PLASTIC |
|
|
|
|
|
|
Accurately machined cast iron, high precision mould. Bolt size +-12mm 4- Part with clamp attached baseplate |
Rigid plastic (light duty) or polyurethane (heavy duty), solid, stable & resistant. Light Duty mould is the best ecomomic mould, made of ABS plastic.Compressed air (2 bar) or water jet is sufficient for extrusion. |
Accurately machined cast iron, high precision mould. 4- Part with clamp attached baseplate |
Rigid plastic (light duty) or polyurethane (heavy duty), solid, stable & resistant. Light Duty mould is the best ecomomic mould, made of ABS plastic. Compressed air (2 bar) or water jet is sufficient for extrusion. |


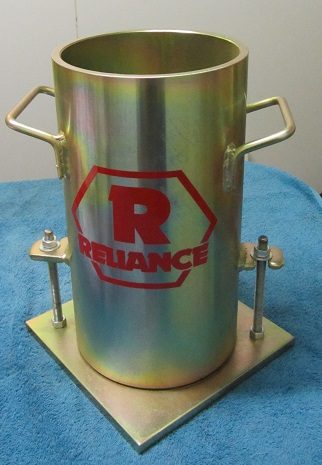
| 150x300mm CYLINDER | BEAM | CEMENT |
|
|
|
|
|
Steel – Moulds are constructed of plated steel for rust resistance and are dimensionally stable under severe use. Moulds are split along one side with 2 quick-acting clamps welded to mould. When open, mould springs apart slightly to allow specimen removal. Include detachable baseplate. Plastic – mould is reusable and sturdy, light and easy to carry, made in collapsible two parts for quick to install. |
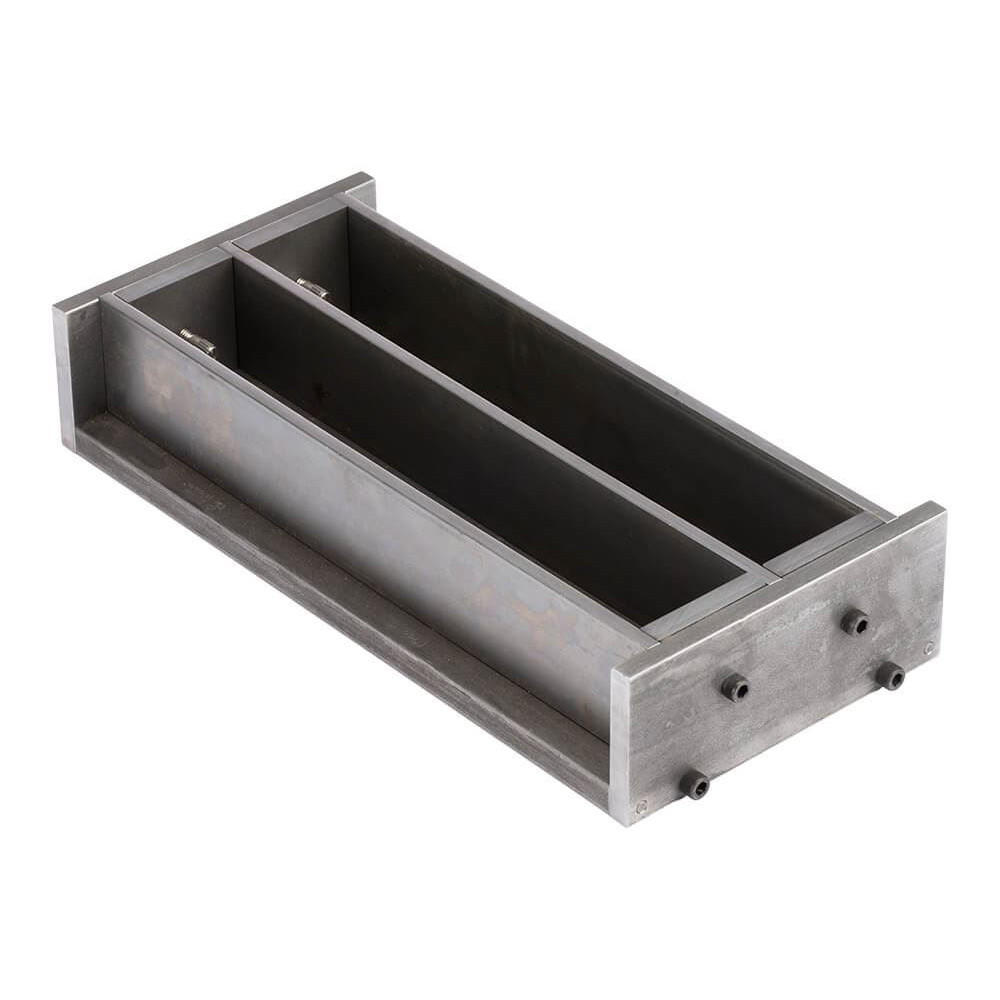
These beam moulds are designed to produce accurate specimens while avoiding distortion over the length of the mould. Cast Iron. | The mould is used for casting specimens of cement aggregate combinations for measuring the potential expansive alkali reactivity. Cast Iron/Steel |


Click Below for Operating Manual:
CONCRETE CUBE MOULD OVERVIEW INSTRUCTIONS
To use concrete cube moulds, you’ll need to prepare the mould, fill it with fresh concrete in layers, compact each layer, and then cure the concrete before removing the mould.The specific steps include cleaning the mould, applying a release agent, filling it with concrete in 50mm layers, tamping each layer, leveling the top surface, and then storing the moulds in a damp environment for the first 24 hours.
-
1. Prepare the Mould:
- Clean the cube mould thoroughly.
- Apply a thin layer of release agent (like oil, petroleum jelly, or silicone spray) to the inside surfaces. This helps prevent the concrete from sticking to the mould.
- Clean the cube mould thoroughly.
-
2. Fill and Compact:
- Place the mould on a smooth, level surface.
- Fill the mould with fresh concrete in 50mm layers.
- Compact each layer with a tamping rod (at least 45 times for 150mm cubes and 20 times for 100mm cubes) to remove air bubbles.
- Ensure the last layer slightly overfills the mould.
- Trowel the top surface of the concrete level with the top of the mould.
- Place the mould on a smooth, level surface.
-
3. Cure and Store:
- Store the moulds in a place with damp air (like covered with a damp cloth) for the first 24 hours.
- After 24 hours, remove the moulds and place the concrete cubes in clean, fresh water until it’s time for testing.
- Store the moulds in a place with damp air (like covered with a damp cloth) for the first 24 hours.
-
4. Remove the Mould:
- Hold the mould in the center by the lip and invert it.
- Gently tap the base of the mould to release the concrete cube.
- If the cube sticks, you can use an air compressor or water pressure to release it.
- Hold the mould in the center by the lip and invert it.
CONCRETE CYLINDER MOULDS OVERVIEW INSTRUCTIONS
To properly use concrete cylinder molds, first, ensure the mold is clean and lubricated. Then, place the concrete in layers (typically 3 layers for 6×12 inch molds or 2 for 4×8 inch molds), using a tamping rod to compact each layer. After filling and compacting, the molds are placed in a controlled environment for initial curing, typically between 60-80 degrees Fahrenheit, preventing moisture loss for 48 hours. Finally, the molds are stripped to reveal the cylindrical concrete specimen.
-
1. Preparation:
- Cleanliness: Ensure the mold is thoroughly cleaned and free of any residues.
- Lubrication: Apply a thin layer of lubricant to the interior of the mold to facilitate easy removal of the hardened cylinder.
- Location: Choose a suitable location for preparing and curing the molds, ensuring it’s free from disturbances and environmental factors that could affect the concrete.
- Cleanliness: Ensure the mold is thoroughly cleaned and free of any residues.
-
2. Filling and Compacting:
- Layering: Place the concrete in layers, typically 3 equal layers for 6×12 inch molds and 2 equal layers for 4×8 inch molds.
- Tamping: Use a tamping rod to compact each layer, ensuring uniform density. For 6×12 inch molds, apply 25 strokes to each layer.
- Alternative: Vibration can be used as an alternative to tamping for full compaction.
- Tapping: Tap the outside of the mold to release air bubbles and help the concrete settle.
- Layering: Place the concrete in layers, typically 3 equal layers for 6×12 inch molds and 2 equal layers for 4×8 inch molds.
-
3. Curing:
- Environment: Place the molded cylinders in a controlled environment to prevent moisture loss during initial curing.
- Temperature: Maintain a temperature between 60-80 degrees Fahrenheit for up to 48 hours.
- Moisture: Ensure the cylinders are kept moist during this period.
- Environment: Place the molded cylinders in a controlled environment to prevent moisture loss during initial curing.
-
4. Stripping:
- Demolding: Once the concrete has hardened sufficiently, carefully strip the mold to remove the cylindrical specimen.
- Stripping Tools: Use a stripping tool or an air hose (if available) to help remove the cylinder from the mold.
- Demolding: Once the concrete has hardened sufficiently, carefully strip the mold to remove the cylindrical specimen.
- Mold Material: Cylinder molds can be made from various materials, including steel, cast iron, plastic, or rubber.
- Standards: Refer to relevant standards, such as ASTM C31 and ACI guidelines, for specific instructions on making and curing concrete test specimens.
- Safety: Always follow safety guidelines when handling concrete and equipment.